Friday, 28 March 2014

Hydra Flak Tank

It's been a busy few months with work but I've managed to shoe-horn in a few games of X-Wing and spend some hours getting a bunch of Imperial Guard tanks up to tabletop standard.  I was going to leave them at that but the acquisition of the Forgeworld Model Masterclass books got me doing crazy experiments with white spirit, bandagaes, artists pastels and florists wire.... don't ask!  I do highly recommend these books, they've helped me raise my game and even won me a GW voucher for a 'best painted' army at a local tournament, so this hobby can pay, well kind of.
The Model Masterclass books are full of inspiring projects and lots of solid advice on techniques, materials and equipment so they are money well spent, in fact they are a bargain when you consider the cost of wargaming models and the ease with which one can wreck them with poorly executed  model making and painting, I've definitely been there.
The Hydra is 95% finished, just a few details to do and a coat of matt varnish and she's good to go, although I'm already thing I need another two thanks to the preponderance of Necron flyers at my local gaming club.  The camo paint scheme was airbrushed over a black base coat letting the black show through in the recesses, I then applied a wash of burnt umber oil paint diluted in white spirit.  This gave me the tabletop scheme as originally intended, but then I weathered further with sponged on paint chips, powdered pastels and selective line highlights to bring the model up and help it 'pop' a bit.  That said I always seem to be a bit conservative when it comes to highlights so i might apply another level.
The transfers came off Games Workshop transfer sheets, when dry I distressed them with the end of a needle file so they look worn just like the rest of the tank.

Monday, 13 January 2014

Something not 40k for a change

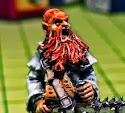
Even the most ardently frothing of 40k fanbeards needs to take a break from the Grimdark occasionally. So after a dig in the box of orphaned pewter bits i found this i-kore Void mini. I've heard rumours of other gaming systems, and whispers that some of them are even well balanced and reward tactical play. Huh! Heresy!
Steve at the local gaming club is running a Supersystem campaign and i painted this chap up to be my hero. The last game i witnessed looked a lot of fun with the hero players ganging up on the gm's nasties and having a good old fight, so i'm looking forward to being involved. Now i just need a back story....

Wednesday, 27 November 2013

Crimson Fists Rhino

Half way into my week off and i've finally got round to picking up my paintbrush. I've just about finish this Rhino, one of two for my fists. Just the lights and lenses to paint then some varnish and it's done. I decided to weather these pretty heavily for the 'on campaign' look. I used paint chipping, oil paint shading and brushed on pastels to make it look a bit dusty.
One tip when using transfers is to distress them a bit with a scalpel to avoid the factory fresh look... unless that's what you're actually after of course.

Tuesday, 12 November 2013

Crimson Fists Land Speeder

I decided to finish this item that has been sat around for a while.  It started life in my younger bro's Black Templars army and it had a pretty thick layer of black spray primer on it which I removed by putting the model in a bath of brake fluid for a few days.  Consequently the surface is puckered where the solvents ate into the plastic, but for a free fast attack choice I can't complain.  I think I'll pair this up with a tempest to make a nice anti-tank reserve choice.


I gently sponged on grey paint on edges and vulnerable areas to simulate paint chips, and chainmail to a lesser degree on extreme edges where paint would be totally removed.

The transfers were applied over a brush painted gloss varnish- you only need to do the part that will be covered by the transfer.  They all had Micro-Sol applied to help the transfer to the surface, on the shoulder pads this took something like 15 applications over a few days so it takes patience, but the end results are worth it as the markings really add to the overall effect.

Sunday, 10 November 2013

Painting the Manticore

I've manged to get some paint on the Manticore this weekend. I decided to go for a camouflage scheme in colours that tie in with my infantry, so after applying a matt black base coat i airbrushed on desert yellow then after it dried i masked off a camo pattern with normal masking tape. I then sprayed on caliban green for the camo pattern.
Removing the masking tape did remove some of the paint underneath so in future i'll use a coat of matt varnish between layers if i'm using a mask.  After some touching up it looks fine but it's worth taking the time to varnish if you're going to use a mask.
The next stage is to detail and use transfers before sealing it and applying weathering.  More pictures soon.

Saturday, 9 November 2013

Magnetising the Manticore

I've been looking for a heavy support choice to complete my 875 point Imperial Guard list for the upcoming tournament, and today an assembled, unpainted Manticore landed on my workbench. The prospect of landing D3 strength 10 pie plates per turn makes this vehicle an attractive prospect.  To avoid burdening my memory during games i decided to magnetise the missiles so i could remove them during play.
You'll need 8 small neodymium magnets (i used 3mm but 2mm might be better), an appropiate sized drill, a scalpel and superglue.
For the missiles, pare away the reinforcing strip halfway between the slots and drill a hole partially into the missile body. Don't go all the way in you just want a countersunk hole for the magnet to sit in.
For the launcher rails you just need to trim away enough plastic halfway  between the tabs to house the opposite magnet.
Before gluing in the magnets make sure you have the poles matched up so they actually attract each other.  Let the glue set and enjoy your magnetised tank... check no one is looking then make 'vwoooosh' sound effects as you fly your missiles across the room and explode them amongst an imaginary xenos horde.  Everyone does this right?
I'm planning an airbrushed camo pattern for this tank, i'll post that up soon.

Friday, 1 November 2013

Crimson Fists Sternguard test mini

Good evening, another productive week on the painting front and hopefully I'll have a squad of my new Sternguard to field at gaming club tomorrow.  I intend to airbrush the basecoat on the Sternguard because it's a lot quicker and I'm starting to feel more confident using the airbrush.  However I painted up one 'test' piece this evening using brushes to check it all hangs together.  I've gone for a white helmet on my veteran, which seems different to the consensus when it comes to Crimson Fists- just do a Google image search of CF Veterans and you'll see for yourself.  I've made the call to give my vet's white helmets, because it looks cool and will help set them apart from their comrades in the battle companies, and of course the Crimson Fists are adherents of the Codex Astartes too (more or less)...

A little added bling in the form of gold edging on the pauldrons and a splash of gold on the weapons will help bridge the gap between my standard troops and the much, much blinging Master Pedro and Captain Jorge.


The whole helmet off thing strikes me as a little crazy fluff wise since it makes a 8 foot tall walking tank into a soft target.  If I was a chapter master then any marine taking his helmet off during battle would be busted back to the scout company.  That said, artistic licence and all, I get to paint a cool beard and the odd bare headed marine looks good on the table, maybe his autosenses have gone wrong and the adeptus mechanicus are too busy figuring out how to wire a plug.

I'm waiting on my Forgeworld transfer sheet, my first tactical squad and my terminators have freehand insignia that look ok, but they were done at serious cost to my sanity.  My previous endeavours with transfers are mixed, so I've ordered some stuff called Micro-Sol which apparently will make life a lot easier and the transfers will look good... we will see.

I also need to find a new lacquer after having a minor disaster with Testors Dullcote, which started dissolving the paint on my newly completed drop pod, luckily i noticed quickly and was able to fix the damage but I'm trying to get to the bottom of the Dullcote issue which prior to the Drop Pod debacle has been excellent for protecting my minis.... I've got two pots of Vallejo acrylic varnish on order, varnish is not as durable as lacquer but i think also less likely to dissolve my paintwork.